
How to Start Your Own Home Hydroponic Garden
Share
Starting a home hydroponic garden is an excellent way to grow fresh vegetables and herbs indoors without the hassle of soil. Whether you're interested in urban farming, self-sufficiency, or simply love gardening, hydroponics offers a space-saving, eco-friendly, and high-yield solution.
1. Choose the Right Hydroponic System
Selecting the right hydroponic system depends on your space, budget, and what you plan to grow. Here are some beginner-friendly systems:
-
Kratky Method – A passive, non-electric method ideal for beginners. It involves placing plants in a container with a fixed nutrient solution and letting the water level naturally drop as the plant grows.
-
Deep Water Culture (DWC) – Roots are suspended in nutrient-rich water and oxygenated with an air pump. Ideal for leafy greens like lettuce, spinach, and Swiss chard.
-
Nutrient Film Technique (NFT) – A continuous flow of nutrient solution passes over the roots. Great for hydroponic basil, cilantro, and parsley.
-
Ebb and Flow (Flood & Drain) – This system floods the root zone with nutrients at intervals. It supports a wide range of vegetables, herbs, and small fruiting plants.
2. Estimate Setup Costs and Time (For an NFT system)
A basic home hydroponic NFT system setup can be both affordable and efficient. Here's a breakdown:
✅ Estimated Setup Costs:
-
NFT channels (PVC or food-safe trays): $50–$100
-
Reservoir container (10–20 gallons): $20–$40
-
Submersible pump & tubing: $30–$50
-
LED grow lights (full-spectrum): $60–$150
-
Net pots and grow medium (Hydroton/clay pebbles): $20–$40
-
Nutrient solution (1-month supply): $15–$25
-
pH meter and EC meter: $30–$60
Total cost: Around $225–$465 USD depending on the size and quality of components. You can also consider purchasing a pre-made hydroponic kit.
⏱️ Time to Set Up:
-
Planning and gathering materials: 1–2 days
-
System assembly: 2–4 hours
-
Seed germination: 3–7 days before transplanting
-
First harvest: 4–6 weeks depending on crop (e.g., lettuce)
3. Example: Small NFT System in a Small House Space
Let’s say you’re working with a 4ft x 2ft (1.2m x 0.6m) space—like a corner in your kitchen or laundry room.
System Components:
-
Two 4-foot NFT channels with 9 grow holes each = 18 grow sites
-
10-gallon reservoir tucked below the channels
-
A submersible pump cycling water through the channels
-
A 4-foot LED light fixture above the channels
Crops: Butterhead lettuce, basil, mint
Yield:
-
Lettuce matures in ~30–40 days
-
You can harvest 18 heads per cycle
-
With 8 harvests/year: ~144 lettuce heads annually from just 8 square feet!
4. Maintenance & Ongoing Costs
Hydroponic systems are relatively low maintenance but do require consistency:
-
Daily: Check water levels, light timer, and system flow (5–10 mins)
-
Weekly: Refill nutrient solution, test pH and EC (15–20 mins)
-
Monthly: Deep clean system, remove algae buildup (30–45 mins)
🧾 Estimated Monthly Maintenance Costs:
-
Nutrient solution: $15–20
-
Replacement pH buffer solution: $5
-
Electricity (lights and pump): ~$8–12/month (varies by region)
Total average monthly cost: ~$25–$40
5. Choose the Right Plants
Not all plants are suited for hydroponics. The best options include:
-
Leafy greens: Lettuce, kale, spinach, arugula
-
Herbs: Basil, mint, parsley, oregano, cilantro
-
Fruiting plants: Tomatoes, peppers, strawberries (require more space and lighting)
Start with fast-growing crops like lettuce and basil, then gradually explore more advanced plants.
6. Hydroponic Lighting & Growing Environment
-
Lighting: Use full-spectrum LED grow lights to mimic natural sunlight. Position the lights about 6–12 inches above the plants.
-
Temperature & Humidity: Maintain an indoor temperature between 65–75°F (18–24°C). Humidity levels should be around 50–70% for most plants.
-
Air Circulation: Ensure proper ventilation to prevent mold and pests.
7. Water, Nutrients & pH Balance
-
Nutrient Solution: Use a pre-mixed hydroponic nutrient solution designed for vegetables or herbs. Follow the manufacturer's dosage instructions.
-
pH Levels: Maintain a pH of 5.5–6.5. Use a pH meter or test strips to check regularly.
-
EC (Electrical Conductivity): Measures nutrient strength. Target EC varies by crop (e.g., lettuce prefers 1.2–1.8).
-
Water Quality: Use filtered or reverse osmosis water to avoid chlorine and contaminants.
8. Containers and Grow Medium
-
Containers: Use food-safe containers or net pots.
-
Grow Medium: Hydroton (expanded clay pebbles), rockwool, or coco coir help anchor roots and retain moisture without soil.
9. Maintenance Tips
-
Check water levels daily.
-
Clean your system bi-weekly to prevent algae and clogs.
-
Harvest frequently to encourage continuous growth.
-
Look for signs of nutrient deficiency (e.g., yellow leaves, stunted growth) and adjust your solution.
10. Benefits of a Home Hydroponic Garden
-
Fresher produce: Harvest within minutes of eating.
-
Pesticide-free: No need for chemical sprays.
-
Year-round gardening: Grow crops in any season.
-
Educational & fun: A great family or school project.
-
Sustainable: Uses less water and space than traditional gardening.
Conclusion
Growing vegetables with home hydroponics is a rewarding, eco-friendly, and cost-effective way to enjoy fresh, pesticide-free produce. With the right setup, you can grow organic greens year-round, even in small spaces. Start small, learn the basics, and expand as your confidence grows.
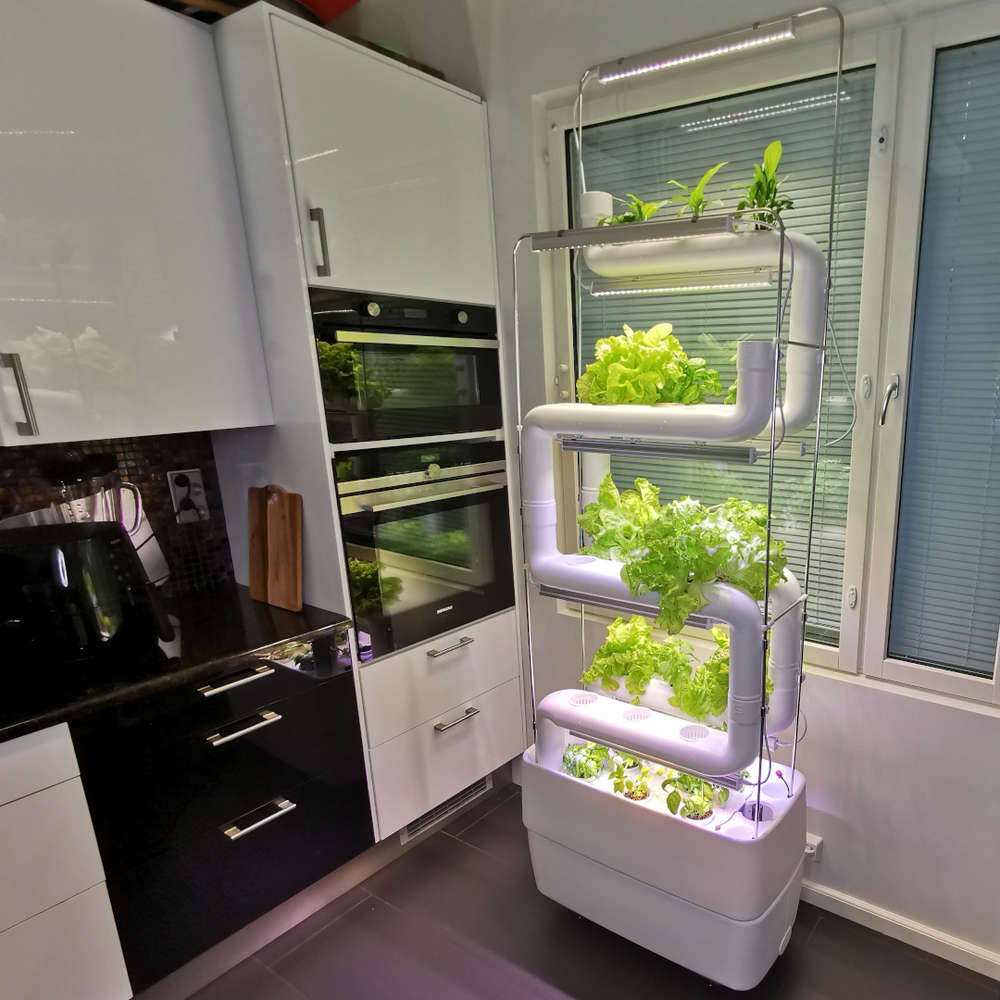
Suggested Image: A compact indoor NFT hydroponic system on a shelf or table near a window, with lush green lettuce and herbs under LED lights, highlighting both simplicity and productivity.